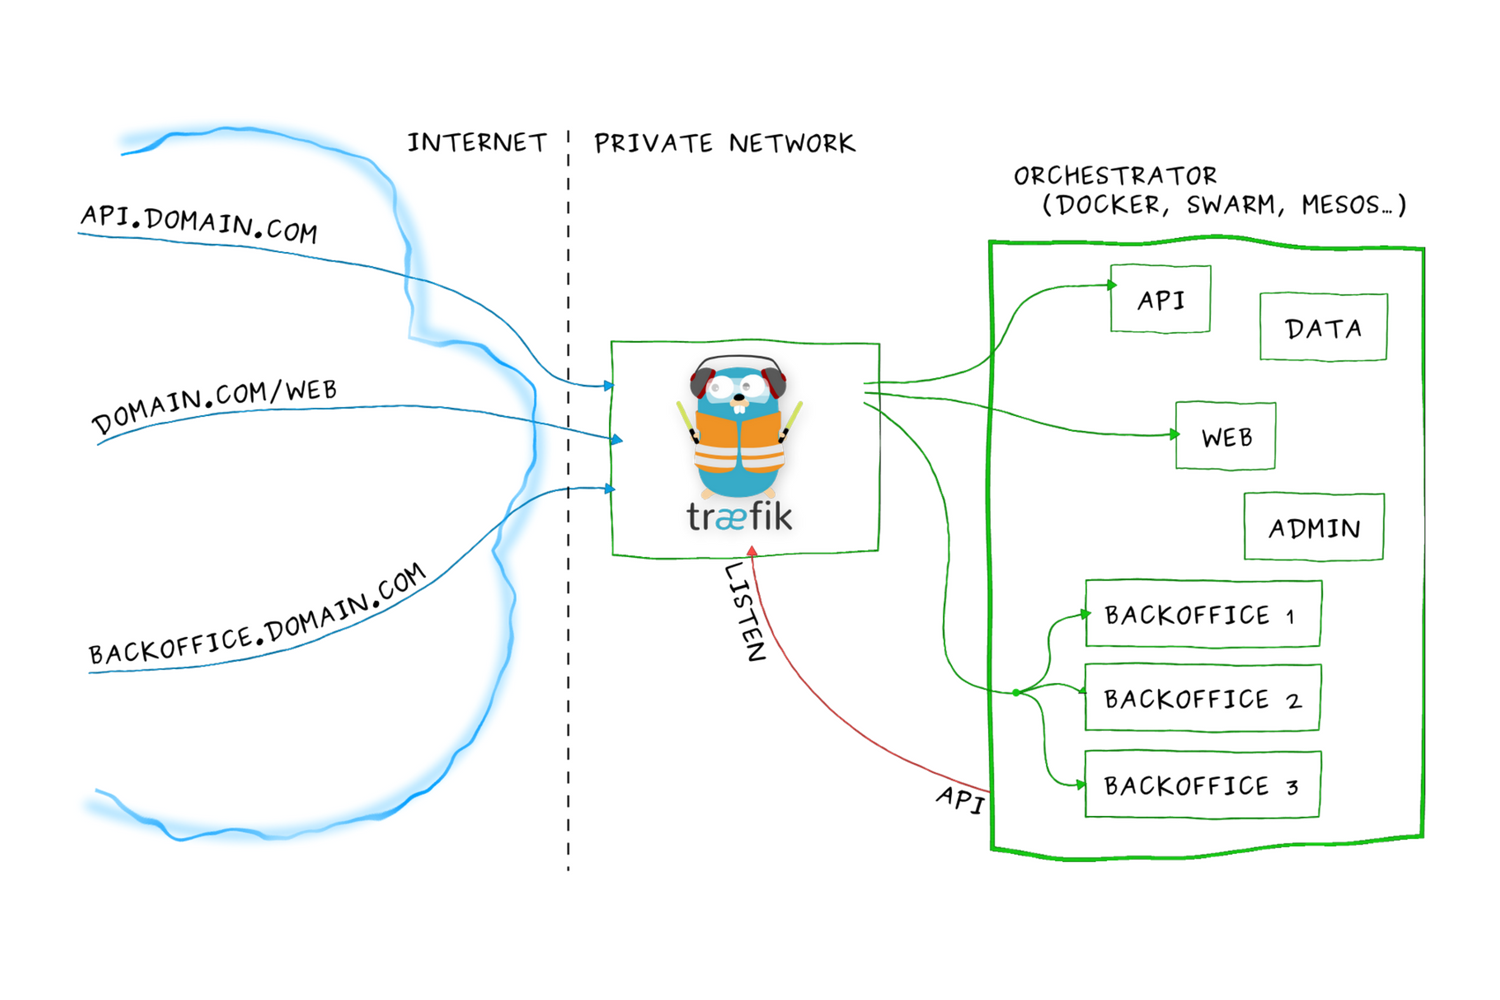
What is Traefik?
Traefik is an open-source dynamic reverse proxy and load balancer. It’s often used as a tool for managing traffic in containerized environments, such as Docker. This tool enables automatic redirection of network traffic to different services based on defined configuration rules. Additionally, it supports various communication protocols including HTTP, TCP, and UDP.
In this guide, I’ll show you how to set up Traefik within Docker.
Benefits of Using Traefik
Traefik is a tool for routing network traffic in a microservices architecture. Its key advantages are:
- Dynamic Configuration: Automatically detects new services and adjusts routing.
- Multiple Data Source Support: Can integrate with various configuration sources.
- Container Support: Easily manages traffic in Docker containers and other technologies.
- Built-in Security: Supports SSL certificates, authentication, and authorization.
- Load Balancing: Distributes traffic evenly among available services.
- Integration with Multiple Systems: Integrates with monitoring tools and orchestrators.

Configuration in Docker Environment:
The first step is to create a directory structure for Traefik:
mkdir traefik
cd traefik
mkdir data
cd data
touch acme.json
chmod 600 acme.json
touch config.yml
The directory structure should look like this:
./traefik
├── data
│   ├── acme.json
│   ├── config.yml
└── docker-compose.yml
The traefik.yml file will look like this:
api:
  dashboard: true
  debug: true
entryPoints:
  http:
    address: ":80"
    http:
      redirections:
        entryPoint:
          to: https
          scheme: https
  https:
    address: ":443"
serversTransport:
  insecureSkipVerify: true
providers:
  docker:
    endpoint: "unix:///var/run/docker.sock"
    exposedByDefault: false
  file:
    filename: /config.yml
certificatesResolvers:
  cloudflare:
    acme:
      email: [email protected]
      storage: acme.json
      dnsChallenge:
        provider: cloudflare
        resolvers:
          - "1.1.1.1:53"
          - "1.0.0.1:53"
Next, create a network that Traefik will use, let’s name it “proxy”:
docker network create proxy
The docker-compose.yml file will look like this:
version: '3'

services:
  traefik:
    image: traefik:latest
    container_name: traefik
    restart: unless-stopped
    security_opt:
      - no-new-privileges:true
    networks:
      - proxy
    ports:
      - 80:80
      - 443:443
    environment:
      - [email protected]
      - CF_DNS_API_TOKEN=YOUR_API_TOKEN
    volumes:
      - /etc/localtime:/etc/localtime:ro
      - /var/run/docker.sock:/var/run/docker.sock:ro
      - /home/username/traefik/data/traefik.yml:/traefik.yml:ro
      - /home/username/traefik/data/acme.json:/acme.json
      - /home/username/traefik/data/config.yml:/config.yml:ro
    labels:
      - "traefik.enable=true"
      - "traefik.http.routers.traefik.entrypoints=http"
      - "traefik.http.routers.traefik.rule=Host(`traefik-dashboard.local.example.com`)"
      - "traefik.http.middlewares.traefik-auth.basicauth.users=USER:BASIC_AUTH_PASSWORD"
      - "traefik.http.middlewares.traefik-https-redirect.redirectscheme.scheme=https"
      - "traefik.http.middlewares.sslheader.headers.customrequestheaders.X-Forwarded-Proto=https"
      - "traefik.http.routers.traefik.middlewares=traefik-https-redirect"
      - "traefik.http.routers.traefik-secure.entrypoints=https"
      - "traefik.http.routers.traefik-secure.rule=Host(`traefik-dashboard.local.example.com`)"
      - "traefik.http.routers.traefik-secure.middlewares=traefik-auth"
      - "traefik.http.routers.traefik-secure.tls=true"
      - "traefik.http.routers.traefik-secure.tls.certresolver=cloudflare"
      - "traefik.http.routers.traefik-secure.tls.domains[0].main=local.example.com"
      - "traefik.http.routers.traefik-secure.tls.domains[0].sans=*.local.example.com"
      - "traefik.http.routers.traefik-secure.service=api@internal"

networks:
  proxy:
    external: true
Then, in the data directory, create a config.yml file.
Setting up BasicAuth Password:
sudo apt update
sudo apt install apache2-utils
Generating BasicAuth Password Hash:
echo $(htpasswd -nb "<USER>" "<PASSWORD>") | sed -e s/\\$/\\$\\$/g
